


Picture reference for patch use.
Mar 18, 2005 17:55:48 GMT -8
Post by Mortain on Mar 18, 2005 17:55:48 GMT -8
Ok, this isn't fancy, but it's decent enough.
(Please note that the dream editor does NOT look like default. These are my own tools for dream weaving I made for myself.)
===============
Step One:
Start by making sure you have all of your patches in their own folder. DO NOT ALTER THE DEFAULT FOLDER

===============
Step Two:
Draw your dream or apply the patch to an exisisting dream, it will first look like the default.

We start off by going to "patches" and then "dream settings"

===============
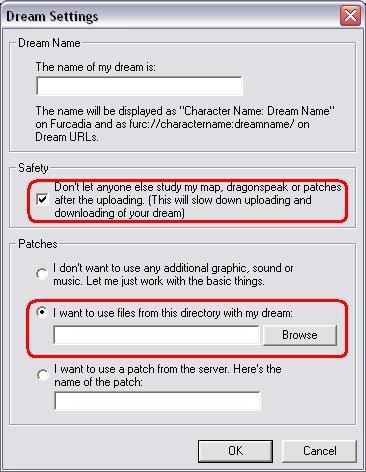
Step Three:
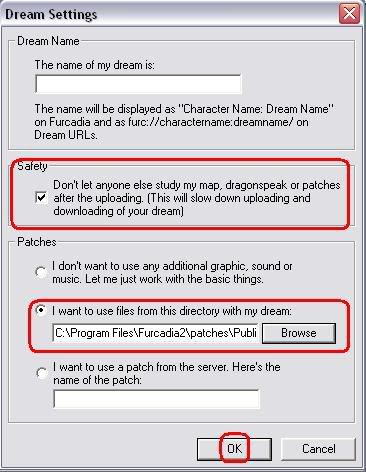
Look at your Dream Settings options. You see Security (encryption) and "patches". Under this area you see the highlighted area. Make sure the bubble is checked before we go to the next stage.
===============
Step Four:
Select Browse and go to the next window "select patch directory"
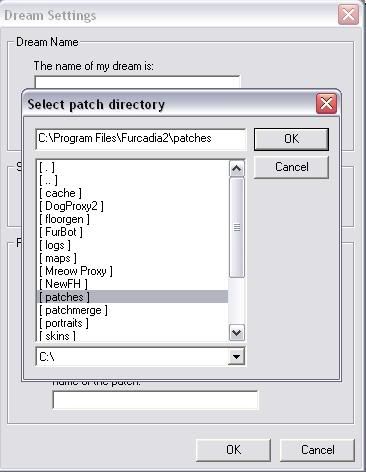
You see folders come up as text. By clicking on the folders you need, you will get to your patch folder that we saw in the first picture.
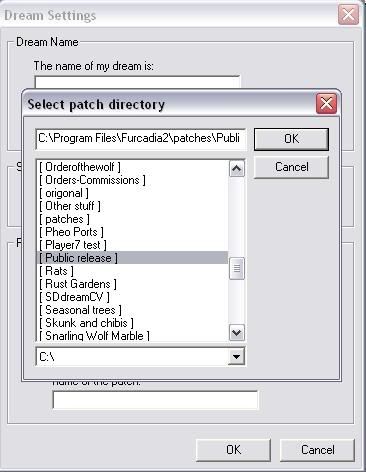

Once you select your patch folder, you should see no more choices as in above picture. Now you are ready to save these settings and look at your patch.
==================
Step Five:
Doublecheck you're settings before you hit ok and make sure you're dream is encrypted if you don't want anyone to get the map or patch. Once done, you are ready to view your patch

==================
Doing updates:
If you do updates to your patch items and can't see them in the dream editor, you just simply need to reload the patch.

==================
It's easier than it seems. Not rocket science and quite fun to play with.
Happy Dreamweaving
Mortain
(Please note that the dream editor does NOT look like default. These are my own tools for dream weaving I made for myself.)
===============
Step One:
Start by making sure you have all of your patches in their own folder. DO NOT ALTER THE DEFAULT FOLDER
===============
Step Two:
Draw your dream or apply the patch to an exisisting dream, it will first look like the default.
We start off by going to "patches" and then "dream settings"
===============
Step Three:
Look at your Dream Settings options. You see Security (encryption) and "patches". Under this area you see the highlighted area. Make sure the bubble is checked before we go to the next stage.
===============
Step Four:
Select Browse and go to the next window "select patch directory"
You see folders come up as text. By clicking on the folders you need, you will get to your patch folder that we saw in the first picture.
Once you select your patch folder, you should see no more choices as in above picture. Now you are ready to save these settings and look at your patch.
==================
Step Five:
Doublecheck you're settings before you hit ok and make sure you're dream is encrypted if you don't want anyone to get the map or patch. Once done, you are ready to view your patch
==================
Doing updates:
If you do updates to your patch items and can't see them in the dream editor, you just simply need to reload the patch.
==================
It's easier than it seems. Not rocket science and quite fun to play with.
Happy Dreamweaving
Mortain